If there’s one look that stays in style no matter the decade, it’s tie-dye! Follow these easy steps to make a colorful tie-dye shirt with your kids.
Materials you’ll need:
- Three-gallon bucket
- Glass jar with a tight-sealing lid
- Rubber gloves
- Measuring spoon
- Fiber-reactive dye (available at craft stores)
- Soda ash fixative
- Tongs
Step one: Prepare the dye.
Tie-dye can get messy, so find a workspace that you don’t mind getting dirty. Wearing rubber gloves, fill the bucket with one gallon of cool water. Fill the jar halfway with cool water. Measure two to four teaspoons of dye powder into the jar. Close the lid and shake vigorously. Pour the dye mixture into the bucket.
Next, fill the jar halfway with hot water. Add six teaspoons of soda ash. Secure the lid and shake well. Pour the mixture into the bucket. Repeat this step for other colors.
Step two: Prepare the T-shirt.
Pick out a 100% cotton T-shirt. Soak the shirt in lukewarm water, wring out excess water, then lay it flat.
Step three: Choose a design.
Choose a design for your shirt, then tie rubber bands tightly in a pattern around the shirt.
Step four: Soak the shirt.
Place the shirt in the dye bucket and stir. Let it soak for thirty minutes to an hour.
Step five: Wash it.
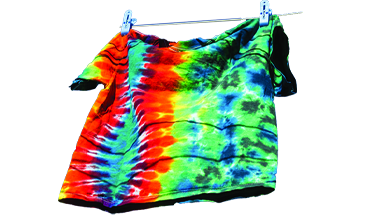
With tongs, remove the shirt from the bucket. Take off the rubber bands. Rinse under warm then gradually cool water until the water runs clear. Wash the shirt alone in cold water, then line dry. Your groovy tie-dye shirt is ready to wear!
Source: www.parents.com