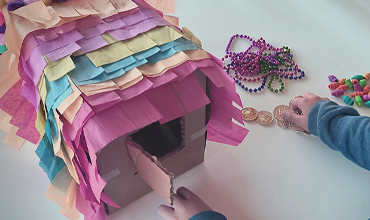
Do you know what makes any celebration a little more joyful? Creating your very own homemade piñata! In Latin America and in the United States piñatas are a fun addition to any birthday party. It’s time to celebrate and create your own piñata!
Materials you’ll need:
Cardboard
Scissors
Hot glue
Colored paper
Tissue paper
Glue
Safety gloves
Step one: choose your shape and cut
A piñata can be any shape you want. Choose your shape and cut it out of cardboard. Don’t forget to get all sides – front, back and the connecting pieces that create dimension.
Step two: glue the cardboard pieces together
Use hot glue to glue the cardboard pieces together and turn your cardboard cutouts into a 3d figure. Be safe and protect your hands from the heat by wearing some safety gloves.
Step three: add a colorful base
Get creative by adding some color. Glue down pieces of colored paper to your cardboard base. You can add as little or as many colors as your heart desires to make your piece come to life.
Step four: pick your tissue paper and cut
Just like your base, pick out some colorful tissue to add movement and texture to your piñata. Don’t be afraid to be bold with your color choices. Cut out as many two-inch strips of tissue paper as you’ll need to cover the piñata. Create fringe by making vertical cuts up the strips, leaving the top 1/3 of the strip intact for easy application.
Step five: glue tissue paper to your piñata
Take your fringed strips of tissue paper and apply the glue to the top 1/3 of the strip. Traditionally, the fringe is applied horizontally, but make this your own and apply it as you wish.
Step six: hang it, hit it, celebrate!
After your piñata is dry, hang it up for decoration or fill it with candy or small toys. Take it to a party and hit it with a broomstick until it breaks open. Have fun!
Thinkery, a nonprofit and Austin’s children’s museum, brings joy to learning through play-based, steam exploration for all children so they cultivate a lifelong love of learning and thrive. Learn more at thinkeryaustin.org.


